Alright, so today I’m gonna walk you through this little project I tackled – messing around with a Randy Jones baseball card and trying to get some data out of it. It was a fun little dive, so let’s get into it.
The Idea Sparked


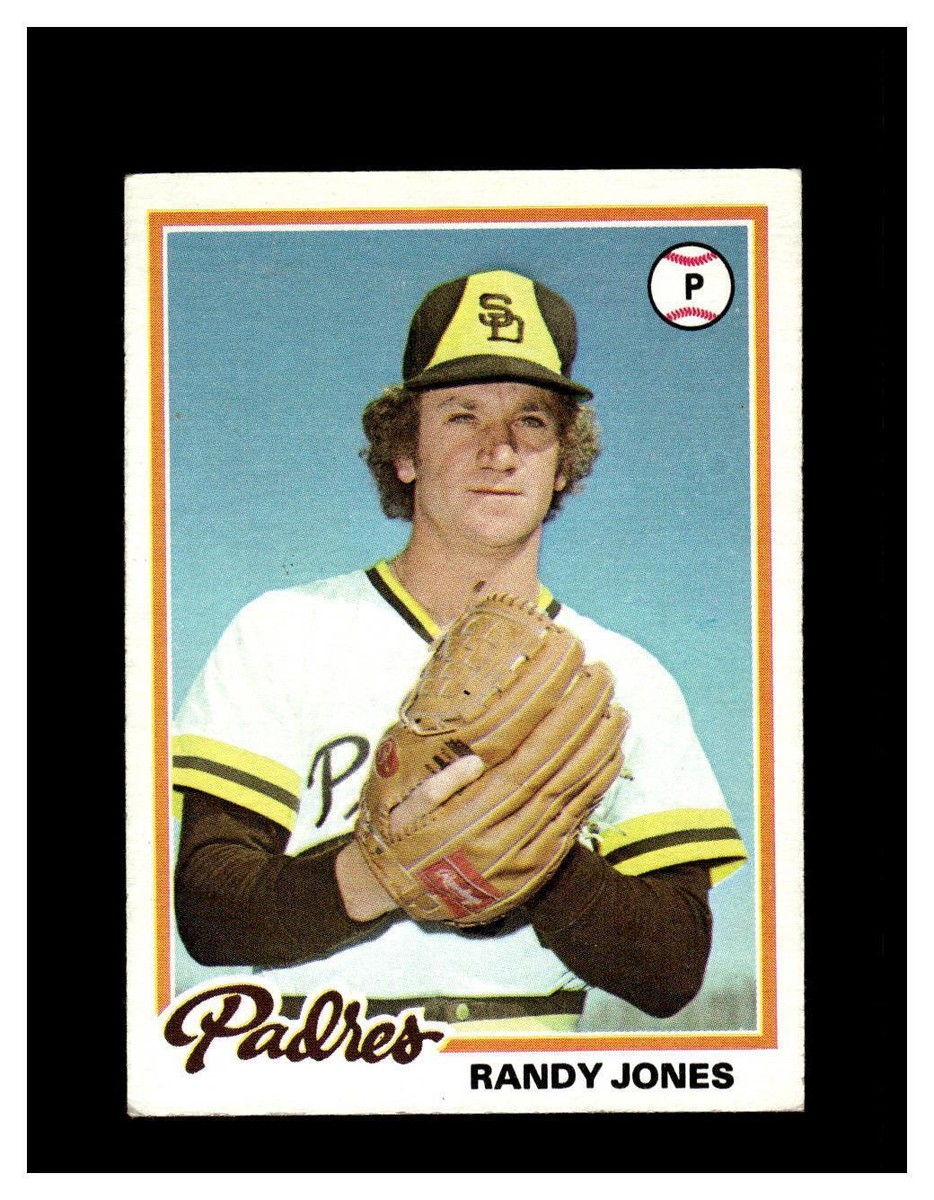
It all started with an old Randy Jones baseball card I found tucked away in a box. I was thinking, “Wouldn’t it be cool to see what kind of info I could pull from just the image?” I’m no expert, but I figured I’d give it a shot.
First Steps: Gathering the Goods
- Got the Image: Obviously, I needed a good picture of the card. Snapped a few with my phone, making sure the lighting was decent and the image was clear.
- Chose My Tools: I decided to go with Python (because that’s what I’m most comfortable with), plus some libraries like OpenCV for image processing and pytesseract for OCR (Optical Character Recognition).
Getting My Hands Dirty: The Process
Okay, here’s where it got interesting. I wasn’t just gonna run the image through OCR and hope for the best. That rarely works, trust me. So, I broke it down into smaller chunks.
- Image Preprocessing:
- Grayscaling: Converted the image to grayscale using OpenCV. Makes it easier for further processing.
- Thresholding: Played around with different thresholding methods (like adaptive thresholding) to make the text stand out more against the background. This involved a lot of trial and error to find the sweet spot.
- Noise Reduction: Used some blurring techniques (Gaussian blur) to smooth out the image and reduce noise that could mess with the OCR.
- Text Extraction (OCR):
- Configured Tesseract: Tesseract is the OCR engine. I had to install it and configure the path in my Python script.
- Ran OCR: Used pytesseract to extract text from the preprocessed image. This part was mostly just calling the function and hoping for something legible.
- Data Cleaning:
- Removed Noise: OCR isn’t perfect. It pulls out a lot of garbage – random characters, symbols, etc. I wrote some Python code to filter out anything that wasn’t a letter or a number.
- Keyword Identification: Tried to identify key information like the player’s name (Randy Jones), team (San Diego Padres, probably), and any other stats printed on the card. This was tricky, as I had to guess which keywords to search for.
The Challenges I Faced
- Image Quality: The initial image quality was okay, but not great. Lighting and focus played a big role. I had to retake the picture a few times.
- OCR Accuracy: OCR is notoriously finicky. It struggled with certain fonts and the overall layout of the card. This meant a lot of manual tweaking of the image preprocessing steps.
- Data Interpretation: Even when the OCR got text right, figuring out what it meant was tough. Was that “ERA 3.2” or “ERA 8.2”? Some of it was guesswork based on context.
The Result
I managed to extract some basic info: Randy Jones, some numbers that could be stats, and a few other random words. It wasn’t perfect, but it was a start! I didn’t get super accurate results but learned that better images are important.
What I Learned

- Image Preprocessing is Key: Seriously, spend the time on this. It makes a huge difference in OCR accuracy.
- OCR Isn’t Magic: Don’t expect it to just work out of the box. Be prepared to tweak and clean up the results.
- Context Matters: Knowing what you’re looking for helps a lot in interpreting the extracted text.
Next Steps (Maybe)
If I were to take this further, I’d probably:
- Try to get a cleaner, higher-resolution image.
- Explore more advanced image processing techniques (like deskewing to correct for any tilt).
- Look into training a custom OCR model specifically for baseball card text.
All in all, it was a fun little experiment. I didn’t get all the data I wanted, but I learned a ton about image processing and OCR in the process. And hey, I got to spend some time looking at a Randy Jones baseball card. That’s always a win.


